I’ve been told (by people who don’t know anything) some of my articles are a bit long. (pardon me for caring) So, I’m going to endeavor to start writing shorter articles more conducive to people simply cutting and pasting the code and not learning anything. (happy now?)
Joking aside, I do get it, I can be a bit wordy. (If being wordy is wrong, I don’t want to be right!)
ANYWAY, let’s look at a pretty useful animation, one that dynamically expands and collapses sections of data, that’s also easy to understand. So, this will be ideal if you’ve never worked with Angular animations before.
The goal is to build a grid of sorts that has section headers and detail rows. The headers are clickable so you can expand and collapse each section individually. You can also add rows to each section and the animation will be able to handle the ever-changing height of each section no problem. There’s no requirement other than bootstrap being installed. Grab the code from my git and follow along. (quickly)
Here’s a screenshot of the expand / collapse in all its glory:
While you’re expanding and collapsing your face off, lets summarize what’s going on here. The HTML is essentially an ngFor that loops through our JSON object of sections and section rows. The add row button simply adds another item to that object.
The sexy part comes about in the div where we’re displaying the section rows:
As we’ve defined the index in our ngFor as i, this will handle as many sections as we wish. The animation magic occurs in that tag in what’s called an animation trigger. (normally I’d write 27 paragraphs about what that is, but I’m being brief)
That trigger, @heightGrow is then bound to a property in our class, in this case an array called expandCollpse. This will have an entry for each section that will have a value of either “open” or “closed”. You could easily use a bool but “open” and “closed” make this example a bit easier to follow.
Now let’s look at our animation and (swifty, rapidly, briskly, with haste) break down what’s going on there:
First, the trigger is set to a constant with the same name. This allows us to organize our code a bit better – we could eventually have a constants file with all our animations then import them where needed in our components. Normally the animation code would go in the animations array in the component decorator, but since we’re using a const, we can just specify that:
Our animation has 2 states ‘open and ‘closed’ each associated with a style. In this case, closed will set the opacity to 0, height 0 and display to none. ‘Open’ will do the opposite and make our animation visible. Adding opacity gives the animation a nice fade in / fade out effect and height having a value of ‘*’ indicates auto height, so the animation will always expand to the correct size of the div.
The final item is the transition which tells it which states will trigger the animation. You can really fine tune this if you have many states (wish I could get into that more…) but in this case the wildcard indicates – animate this when any state goes to any other state (open to closed, closed to open, etc.). The 300 is how many milliseconds the transition will take.
Now that everything is wired up all we need to do is change that property when a section header is clicked on, and the animation will fire:
And Volia! Hopefully this gives you a bit of comfort with Angular animations as well as providing you with a handy expand / collapse animation you can use for yourself.
And I’ll stop talking now. Really this could have been 3x as long. But I’m fine. I can be brief.
I know what you’re thinking. “I want to have a sexy looking web form with a sweet Angular Typeahead component so all the women and or men will want me.” So, spoiler – nobody is going to be more attracted to you because you’ve implemented a Typeahead search. BUT it will give your users a much more satisfying usability experience in your app.
That’s kind of the same! (That’s not the same at all.)
So, let’s continue our never-ending quest to understand all the higher order mapping operators by coding a Typeahead search. We’ve used concatMap on multiple occasions, in Avoiding Nested Subscriptions in Angular and also Populating Multiple Dropdowns in Angular Using forkJoin. Today we’ll be letting switchMap show its stuff and why it’s so useful in a situation like this – where the user will be changing their search term frequently, essentially every time they are done typing.
So, let’s jump right in. First thing we’ll need is Angular Material. We’ll be using the material autocomplete form control for our Typeahead. It takes care a lot of the details for us so it’s ideal for this example. Plus it looks sexy. (Again, the woman and or men are NOT going to want you for implementing a Typeahead in your code – I can’t stress this enough.)
Let’s modify our app module to import the Angular Material items we need. Let’s also add Forms and Reactive Forms as we’ll use those later as well. Add these imports and also add them to the imports array:
App Module (app.module.ts)
import { FormsModule, ReactiveFormsModule } from '@angular/forms';
import { MatFormFieldModule } from "@angular/material/form-field";
import { MatInputModule } from '@angular/material/input';
import { MatAutocompleteModule } from '@angular/material/autocomplete';

.....

  imports: [
    BrowserModule,
    AppRoutingModule,
    BrowserAnimationsModule,
    FormsModule,
    ReactiveFormsModule,
    MatFormFieldModule,
    MatInputModule,
    MatAutocompleteModule
  ],
Now let’s start on our app. We’re going to create a system whereby new superheroes in the Marvel universe can see what superhero names are still available. (There’s not many after 15 years.) Once they select an available name from our Typeahead, they’ll be directed to a detail page where they can see more information about the name, how much it costs, their origin story, what superpowers they will gain, etc.
I’m fairly certain this is not how new superheroes come about. But let’s get going!
To start, we’ll create a service to return the available superhero names for our users to choose from. In the real world, this would obviously be a database operation where our API would submit a query to our backend to retrieve the list of names and eventually detail information. However, in this article we’re just going to focus on the Typeahead, so in our service we’ll simply return a JSON object array. We’ll also filter that array on items that contain any of the characters in the search term the user has entered.
So again, this would be a database call in a real app, and the filtering would occur there, but for our example we’re just going to return the list of available names and filter on the variable “searchValue” passed to our service method getDropDownData. Note each item has a value of “disabled: false” added to it. You’ll see why in a bit.
Our app also is going to have a search form and a detail form as the landing page once a search item is selected in our Typeahead. We’ll use Angular Routing and set up our app component form with pretty much nothing but some text and a router outlet:
App component (app.component.html)
<h1>The Big List of MCU Unused Superhero Names.</h1>
<h2>Please Select Your New Identity!</h2>
<router-outlet></router-outlet>
Now let’s create our 2 components, the search and detail:
>> ng g c type-ahead

>> ng g c detail-page
And then one last item before the fun begins, let’s add our routing with a default route of our Typeahead search component:
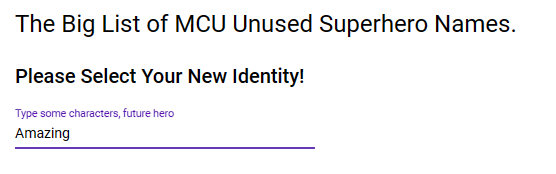
So let’s look at the 2 main parts of our form. First we’re wiring up a mat-form-field wrapper for everything. The first item within is a placeholder, which just looks impressive, and also gives some rudimentary instruction, in this case “Type some characters, future hero”
        <mat-form-field style="margin-left: 20px; width: 300px;">
            <mat-placeholder>Type some characters, future hero</mat-placeholder>
Next the actual matInput for our textbox to type in:
We also wire our input up to a formControl in the code behind called “searchBox”, so we can access it programmatically. Finally we wire up this input to our auto complete element which we’ll discuss next. This is done by setting the [matAutoComplete] property of the matInput to a template reference of “ac” (though you could use any name):
[matAutocomplete]="ac"
This is the template reference we’ll specify on our autocomplete so the two can interact. And that brings us to our Angular Material auto complete item:
As stated, we’ll assign the autocomplete a template reference of “#ac” so our input can talk to it. We’ve also got a method tied to the optionSelected event of the auto complete. This fires, (you guessed it future hero!) when one of the autocomplete items is clicked on. That’s where we’ll determine what item was selected and route to our detail form. The remainder is a pretty typical ngFor, which will loop through each item of our searchResults array and bind them to the autocomplete. However, do note we’re also setting the disabled attribute of each item to the disabled property of each object in our JSON array. Again, you’ll see why this is when we get into the code behind, but every item from our service has “disable = false”, so they are all selectable.
Let’s see what the fruit of our thus far labor looks like. In order to get this code to compile, temporarily add these 3 items to the component class in the typescript file.
Typeahead component (type-ahead.component.ts)
export class TypeAheadComponent implements OnInit {

  public searchBox = new FormControl();
  public searchResults: any[] = [];

  itemSelected(event): void {
  }
We’ll delete all that in a minute, but now our code will run, and you can see what our form looks like in all its glory, albeit with no items being returned when we type:
You can see the placeholder already knows how to behave and gives a very nice effect when we click in the input and type something. Go ahead and delete the items we temporarily put into the component, and we’ll start building the real component.ts file a piece at a time. Let’s start with all the class variables we’ll need:
Typeahead component (type-ahead.component.ts)
export class TypeAheadComponent implements OnInit {

  public searchBox = new FormControl();
  public clearedBox = true;
  public searchTerm = '';

  // Object bound to autocomplete
  public searchResults: any[] = [];

  // Empty default object for when the search box doesn't have anything in it
  public defaultResults: any[] = [];


  // JSON to display when no items are returned from the service
  public noResult: any = {
    id: 0,
    value: 'No names match criteria',
    disabled: true

  };
  public noResults: any[] = [];
We start by declaring our FormControl called searchBox which is the input on our form. Then we create a Boolean called clearedBox (more on that in a bit) and a string to hold our searchTerm called, um, searchTerm (duh.) Next searchResults is the array that is bound to our autocomplete and will be assigned the values returned from our service. We then set up 2 more arrays:
defaultResults which is an empty array we use to initilze the list to nothing.
noResults which is what we want to display if the user types something that has NO match in our list. (Note disabled is set to true for this item. Again you’ll see why in a minute.)
We’ll pass 2 services into the constructor, the router service and of course our Typeahead service:
Now onto the ngOnInit method and all the nougaty goodness that makes this form work. Here’s the entire ngOnInit – we’ll break it down bit by bit after:
  ngOnInit(): void {

    // Add our not found item to the noResults array
    this.noResults[0] = this.noResult;
    // set the inital value of searchResults to our empty array
    this.searchResults = this.defaultResults;
    // Setup a debounce time constant of 1/2 a second.
    const DEBOUNCE_TIME = 500;


    // get values from the service
    this.searchBox.valueChanges.pipe(
      debounceTime(DEBOUNCE_TIME),
      switchMap(changedValue => {
        if (changedValue.trim() !== '') {
          this.searchTerm = changedValue.trim();
          this.clearedBox = false;
          return this._TypeAheadService.getDropDownData(this.searchTerm);
        } else {
          this.searchTerm = '';
          this.clearedBox = true;
          return of(this.defaultResults);
        }
      }
      )
    ).subscribe(data => {
      if (data.length === 0) {
        if (this.clearedBox) {
          this.searchResults = data;
        } else {
          this.searchResults = this.noResults;
        }
      } else {
        this.searchResults = data;
      }
    }
    );
  }
Before we call our service, we do some simple things like adding our noResult object to the noResult array, set searchResults to defaultResults (blank) and also setup a constant for debounce time. (I put the constant definition right above the service call for readability, you’d put it in the class variables normally).
And now the actual subscription. We’re going to subscribe to an event called valueChanges of our searchBox control. In Angular, FormControls (and some other form objects) have a really useful event exposed called valueChanges. valueChanges is an observable that we can subscribe to so that each time the value of the textbox changes we can do stuff, in this case, filter our autocomplete list of items.
Starting with valueChanges, we pipe the results:
this.searchBox.valueChanges.pipe(
We pipe the results to the debounceTime operator. This guy is a lifesaver. It allows you to wait a certain amount of time before emitting. In our case we set this to a half a second, using our constant:
debounceTime(DEBOUNCE_TIME),
Now if the user fires valueChanges again (i.e., types something else within half a second), the timer is reset and the half a second count begins again. Why do we do this? Well imagine if we didn’t do this – Our autocomplete would fire off populating a new list after every character entered, as the user types. If there were a delay in the results being returned as would be typical in a real-world app, we’d be firing off API calls left and right before any of them had a chance to return results, putting more stress on the backend / db than needs be. By using debounce, we create a magical, pleasant experience where the webform essentially says to the user – “Ok, are you done typing? Since it’s been half a second, I think you are, and I’ll go populate the autocomplete list now. Also have a great day!”
Now we need to emit this value (what the user has typed) to a new observable. We do this using a higher order mapping operator. In our case switchMap is going to work great with our Typeahead. switchMap unsubscribes from any prior inner Observable and subscribes to any new inner Observable. This has the very desirable effect of stopping any prior inner Observable before processing the new one, exactly what we want in this case. In other words, if switchMap could speak English it would say something like – “Hey, we got a new value emitted here, whatever you were doing – just throw it out the window and process this new value. Also, have a great day!” (Our sentient code creatures are apparently very polite.)
switchMap(changedValue => {
We’ve called our debounced value “changedValue” and we’ll just simply check that the change wasn’t the user clearing the textbox out. Also, If the user cleared out the text or typed something that had no matches, we’ll handle all that shortly.
if (changedValue.trim() !== '') {
Passing that check, we know the user actually did type something, so let’s do a few things. First, we’ll trim the value:
this.searchTerm = changedValue.trim();
Next we’ll set the variable we have called “clearedBox” to false. We use this Boolean to indicate if the user cleared out the text box or not and handle that in the subscribe. Since we checked for a value above in our if, we know this is false and the user hasn’t cleared the textbox:
this.clearedBox = false;
Finally we pass the search term to the service and return the Observable to our subscribe:
Otherwise (else), the user did indeed clear the box. In that case, we set searchTerm to “”, set clearedBox to true, and return an Observable of defaultResults which again we simply defined earlier as an empty array:
So, we’ve called our service and MAYBE gotten some data back, we don’t know yet – the user could have typed complete gibberish into the search box, or some characters that don’t match any name in our list. So let’s check if the service returned any values:
if (data.length === 0) {
Now you’ll see what “clearedBox” is used for. Recall a bit back, prior to our subscribe, we’re returning one of 2 observables. Either the result set from our service (if the user actually typed something) or our default result (if the user cleared out the textbox). If the latter, we also set clearedBox to true. Thanks to that good work, when we subscribe, we will now automatically get the appropriate observable plus we’ll know if the user cleared the textbox. So all we really need to check for now is did the service return any data, i.e., is the length 0 or not. The reason being- we want to differentiate if the service returned no rows (the user typed something that didn’t return any names) or the user cleared the textbox. If we set clearedBox to true earlier, the user indeed cleared the checkbox, and we simply display the defaultResults we are returning automatically in the observable. If clearedBox is false and the service data.length = 0, we know the service didn’t return any matching rows. In that case, we want to display the noResults array (the message saying, “No names matched”.) This way we’re not telling them the service returned no results if they cleared the textbox, which would be annoying. So if they cleared the textbox, display the observable, otherwise display the noResults message:
Else (if we have a data.length that doesn’t equal 0) the user typed a search term that had some matches, the service indeed returned some data and that’s what we’ll display in the Material autocomplete:
 } else {
  this.searchResults = data;
 }
}
Now the data our autocomplete display is all taken care of, for the last bit of our component, we’ll handle the itemSelected event and route to our detail page, passing along the id of the selected item, utilizing the state navigation option.
Ok. Let’s have a look at all this working! But first let’s code up our simplified detail component as that’s the final piece we’ll need. The component code:
In our itemSelected() event handler in the Typeahead form, we passed along the option value that was selected using a variable we called selectedId. Our detail page does nothing more than grab this variable from the navigation state and assign it to a local variable of the same name, selectedId. In a real-world app, you’d take this primary key, and run a query to return detail information of the item they selected. In our unused superhero name app, we’d requery the database to get all the specifics on the name they selected, such as what superpowers it comes along with, their origin story, pricing, etc. and ultimately a way to purchase the name. But again, that’s beyond the scope of the Typeahead that’s being demonstrated in this article, so our detail form will simply display the key of the item selected:
Detail form (detail-page.component.html)
<h3>You selected the item with id of {{ selectedId }} !!</h3>
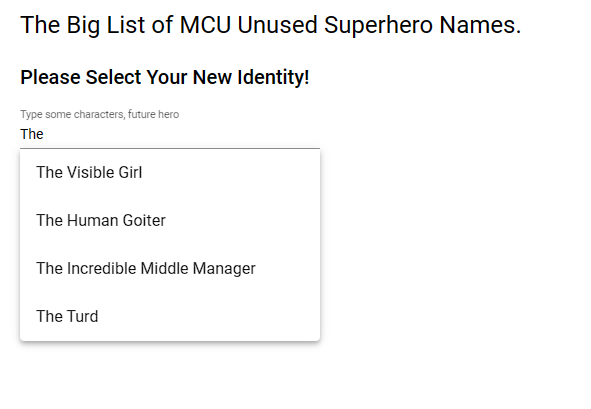
And with that, our unused MCU superhero name generator lookup thingy is ready to roll! Let’s fire off the app and see how everything functions. Start the app and type the word “the” into our input:
Excellent – you can see the values are filtered on anything that contains the word “the”. Notice how the debounce of 1/2 second is also working. If you type “the” one letter at a time very slowly, you can see the list is refreshed for every letter you type. But if you type “the” somewhat quicker, the debounce ensures that the list is only retrieved when you are done typing. (haven’t touched a key for the 1/2 second, firing the valueChanges() event.) Debounce makes for a pleasant UX experience and prevents our API from getting called more than necessary. Win / win for all.
Back in our app, go ahead and select “The Incredible Middle Manager” (No doubt his superpowers would include scheduling meetings and micromanaging in a single bound):
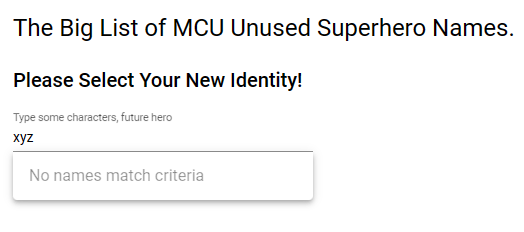
And voila, we have the primary key (id) of the item selected in the previous form by our Typeahead! Let’s do a few more things to see some of the remaining functionality we coded. First off, return to the type ahead form and type some gibberish, “xyz” or anything that won’t return any results:
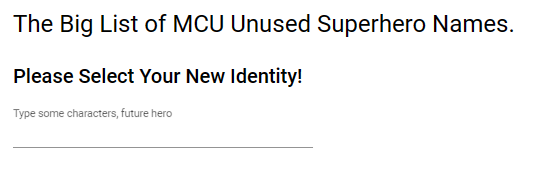
Remember how we set disabled: true on our no results item? Now you can see why – the user gets a message that states nothing was found for that search string, but it’s not something they can select. There’s a couple of ways to handle a no results message, but I like this way for a few reasons. First, it’s not a lot of code and second, the message shows up in the autocomplete, exactly where the user expects their results to show up. If we put “No names found” in a separate label somewhere else on the screen, it would be a bit jarring, and I like consistency. So with the simple addition of “disabled” true or false to each item, we can display whatever we want in the results AND prevent the user from clicking on informational messages. But feel free to handle this message differently if you care to. Finally, go ahead and clear out what you typed in the box:
Notice how we don’t get the “No names found” message any longer. We wouldn’t want to tell the user nothing was found every time they deleted the text from the input. Our user might start screaming uncontrollably “Duh, I haven’t typed anything yet!” and perhaps throwing office furniture, which would suck.
Note: If you grab this code from my GitHub, I’ve included comments in the Typeahead component as to where you would open and close a loading dialog so the user would get a “Please wait…” type message while the data is retrieved:
      switchMap(changedValue => {
      // Close Loading Panel
        if (changedValue.trim() !== '') {
          this.searchTerm = changedValue.trim();
          // Open Loading Panel
We looked at using concatMap to populate a dropdown prior to assigning a selected index in this article: Avoiding Nested Subscriptions in Angular. Waiting for an observable to complete before starting another observable has many use cases. However today let’s look at a case where we’re going to fire off multiple API calls and we don’t care about the order in which they are run. In fact, we want them to execute in parallel for the best performance.
The use case being – “Go fire off these 3 observables, I don’t care about order, but once they are ALL done, I want to take some other action.”
As always, let’s start a fictitious company. We run a car dealership (mainly because I can’t think of anything else right now). We sell high quality new and used cars for no more than MSRP. In fact, we sell our cars at a discount, treat our customers well, and never lie to them.
Pretend is fun.
For our inventory lookup tool, we use an Angular app that salespeople can use to find out details about the cars on our lot. In our simplified example, our app has dropdowns for things like color, year, and transmission. Our car detail record stores the selected value for each dropdown in the form of the key from a hypothetical dropdown table that stores all our dropdown key and value pairs.
So, to sum up, whenever a car is selected, we have:
3 dropdowns we want to populate
We don’t care what order they are populated in
However once ALL of the dropdowns populate, we want to take the action of selecting the correct values for each vehicle
As well as populating some other form fields
Let’s get started with a service:
>> ng g s vehicle-information
Inside this service, we’re going to simulate a table that stores all our dropdown key / values, classified by type. getDropDownData() will return the values for each select, filtered on the type passed in. We also have another method that returns a vehicle detail record filtered on the vehicleId passed in, getVehicle().
Vehicle Information Service (vehicle-information.service.ts)
Now on to our form. For now, let’s start with doing nothing but populating the 3 dropdowns to demonstrate how forkJoin works. We’ll use some css classes to simulate a “please wait” type message. For now, I’ll just use a ‘light’ them and ‘normal’ theme – ‘light’ means data is loading, with ‘normal’ meaning the data load is complete. Creating a “Please Wait / Data Loading” type of dialog isn’t the purpose of this article but if you want to have a look at a full and complete example of creating a “Data loading” type dialog, have a look at Displaying a Loading Dialog on an Angular Parent Component While Child Components Load.
So back to our form:
App Component Form (app.component.html)
<div [ngClass]="divClass">
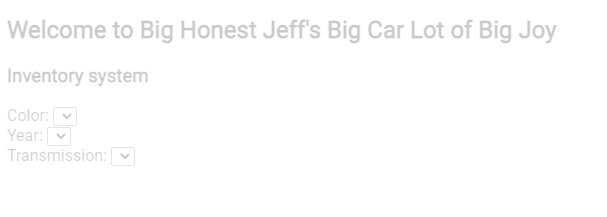
<h2>Welcome to Big Honest Jeff's Big Car Lot of Big Joy</h2>
<h3>Inventory system</h3>
<div>
Color: <select formControlName="colorSelect">
<option *ngFor="let c of colors" [value]="c.id">
{{c.value}}
</option>
</select>
</div>
<div>
Year: <select formControlName="yearSelect">
<option *ngFor="let y of years" [value]="y.id">
{{y.value}}
</option>
</select>
</div>
<div>
Transmission: <select formControlName="transmissionSelect">
<option *ngFor="let t of transmissions" [value]="t.id">
{{t.value}}
</option>
</select>
</div>
</div>
And in the scss file, our 2 simple classes:
App Component Style Sheet (app.component.scss)
.light {
    opacity: .2;

}
.normal {
    opacity: 1;
}
And then finally our component to populate the drop downs. setTimeout() will simulate loading behavior by delaying our form population by 2 seconds:
So when we first fire up the app, you’ll notice that the screen has the ‘light’ css class applied while we wait for the 3 dropdowns to be populated:
Once everything is bound to our ngFor variables for our dropdowns, we set the css class to ‘normal’, restoring a complete look:
Fabulous!
Before we add the remainder of our code, let’s have a look at what forkJoin is doing and how it works. Unlike your traditional call to a service method that returns an observable, forkJoin actually takes an array of method calls. This can be 2, 6, or even 43 or more:
forkJoin then returns, you guessed it, an array of values. Assigning them to variables is as simple as using the array index that corresponds to the order in which they were called:
This is a super useful way to fire off multiple requests when we don’t care about what order they complete in. However, our original use case said we want to do something AFTER these 3 calls complete. In this case, we want to select all the appropriate selected index values for the dropdowns, as well as populate some other form fields.
So let’s do that very thing. We’ll need a higher order operator like concatMap or switchMap to chain our observables together. Since our observables are all just simple simulated API calls (what would typically be an HTTP get request) that return just one value, it’s not super important which operator we use. If any of our observables were to emit more than one value, it would become quite important which operator we use (article forthcoming….) But in this example, we’ll just use concatMap. Because I like concatMap. (To see switchMap really shine check out Implementing a Typeahead search in Angular using switchMap when you have the urge.)
We’ll start in this case by calling our getVehicle() method, storing the retuned value in a variable called ‘vehicle’ and then chaining that to our forkJoin. We’ll hard code an id for this example, but in the real world you’d have a list of vehicles and clicking on a vehicle would bring you to this very detail page and call getVehicle() with the appropriate id. In this case we’ll just use “1”. Once all the observable values are returned in the subscribe, we can assign our selected indexes as well as populate a form field or two. Let’s look at the revised HTML first:
App Component HTML (app.component.html)
<form [formGroup]="myFormGroup">
    <div [ngClass]="divClass">

        <h2>Welcome to Big Honest Jeff's Big Car Lot of Big Joy</h2>
        <h3>Inventory system</h3>

        <div>
            Make: <input type='textbox' formControlName="make">
            Model: <input type='textbox' formControlName="model">
            Price: <input type='textbox' formControlName="price">
        </div>


        <div>
            Color: <select formControlName="colorSelect">
                <option *ngFor="let c of colors" [value]="c.id">
                    {{c.value}}
                </option>
            </select>
        </div>
        <div>
            Year: <select formControlName="yearSelect">
                <option *ngFor="let y of years" [value]="y.id">
                    {{y.value}}
                </option>
            </select>
        </div>
        <div>
            Transmission: <select formControlName="transmissionSelect">
                <option *ngFor="let t of transmissions" [value]="t.id">
                    {{t.value}}
                </option>
            </select>
        </div>


    </div>
</form>
Since we’re using a big boy form now (albeit an absolutely hideous, unstyled form), we need to add an import to our app.module so add ReactiveFormsModule to the imports array:
So we’re setting up a proper form in the OnInit then getVehicle(1) begins our chain. (use any id you’d like. As long as it’s 1, 2, or 3.) We then pipe that to concatMap and assign the value that getVehicle() returns to our ‘vehicle’ variable (I’m very creative with naming, you don’t have to tell me). Then instead of setTimout like we used in the previous example, we pipe that to the delay operator. If you’ve never piped to the delay operator, it’s a very useful thing for testing, making it easy to simulate long API or http calls. You can read more about delay in the links at the end of the article. Once we finally subscribe and get our values back from our forkJoin call, we populate our 3 dropdowns then populate everything else on our form using all the values stored in the vehicle object (vehicle 2 in this case):
You can see how forkJoin becomes a very useful tool for returning multiple values when you truly don’t care about what order the observables are returned in, which for many things like dropdown lists, is typically the case.
In summary, I hope you’re getting as excited as I am about all the options you have in rxjs / Angular for piping your results to other operators, piping yet again, and making all kinds of magic happen (I really need a girlfriend).
NOTE: One sort of gotcha when using forkJoin is that if any of the observables in the array generate an error, you’ll lose the values of ALL the observables. In this particular example, I wouldn’t have a problem with that – If some dropdown couldn’t be populated, we don’t want the user to try to edit a form that’s only half populated. I’d like to generate an actual error and prevent any editing of the form data until the situation is corrected.
However, if you DO indeed want, say 2 dropdowns populated if only 2 calls succeed, a way around this (there’s a good example of this method in the learnrxjs.io link at the end of the article) is to simply handle the error on each observable using catch error. So instead of this:
Now if any call fails, it will simply catch the error and return an error in that array element. As the final step to this method, we now need to test for an error in our assignment code in our subscribe method:
    )).subscribe((dds) => {

      if (!(dds[0] instanceof Error)) {
        this.colors = dds[0];
      }

      if (!(dds[1] instanceof Error)) {
        this.years = dds[1];
      }

      if (!(dds[2] instanceof Error)) {
        this.transmissions = dds[2];
      }
The following snippet in our component will demonstrate this:
Now each item in the forkJoin array is being piped to catchError, which will handle the error if one is raised on each individual call. Also, notice in the first item in the forkJoin array, we’ve replaced the call to get the Color values with a throwError() to generate an error. However, since we’re catching it as well, our subscribe will no longer populate that dropdown if an error is returned:
      if (!(dds[0] instanceof Error)) {
        this.colors = dds[0];
      }
You can see now the dropdowns are populated except for the one that threw an error:
Again, dropdowns are probably not the best use case for this error handling technique, but now you know how to handle preserving observable values from forkJoin should one or more of them happen to fail, should that suit your needs.
When it comes to components, Angular is one giant dysfunctional family. Parent components constantly trying to control its child component behaviors, child components resenting its parent components and giving them the finger and staying out to all hours, failing out of school and living at home until they are 30.
Wait, that’s not Angular, that’s my family.
ANYWAY, we certainly have to deal with parent components managing child components in Angular. Child components typically load their own data and when you have many child components making their own API calls, populating forms, etc., it would be nice to have a way for the parent to coordinate all that.
A simple use case, but one I find out coming up quite a lot is, I want to display a loading dialog on my parent component, something like “Please wait” or “Loading data” (with some animated something or other) until ALL my child components have loaded their data. In this article I’ll outline a fairly straightforward method I use to do just that and all it uses is output variables and some simple math.
For the “Loading” dialog, I’ll use an Angular overlay. An Angular overlay creates a floating panel and also darkens the rest of the screen to visually indicate to the user, “Just wait a minute Skippy, don’t do anything yet” which I like.
Let’s start by creating a “Loading Data” component to serve as our overlay. We’ll also be using Angular Material in this project (I use it in most projects) as it creates some nice modern looking web components.
Let’s install that first into our project:
>> ng add @angular/material
You’ll be prompted for a few things, just pick a nice color scheme and respond (y)es to any questions. Then we’ll need to modify our app.module.ts to import some items from Angular Material. We’ll need two imports in this case, the mat-card and the progress bar:
import {MatCardModule} from '@angular/material/card';
import {MatProgressBarModule} from '@angular/material/progress-bar';
Then we need to include them in the imports section:
This is the part of Angular Material that can be a bit of a pain, locating where to import the thing you want to use from. Easiest way is to go to this link: https://material.angular.io/components/categories. Then find the thing you’re wanting to use and click on the API tab:
In this case we selected “Button” on the left. The API tab then tells us what import we need to use.
One other item we’ll need to install is the Angular CDK, which stands for component development kit. This library contains several objects that we’ll need for this example. Let’s also install that:
>> npm install @angular/cdk
And again we’ll need to modify our app.module.ts file to import the module and include it in our imports arrray (new code only displayed):
import { NgModule } from '@angular/core';
import { BrowserModule } from '@angular/platform-browser';

import { AppRoutingModule } from './app-routing.module';
import { AppComponent } from './app.component';
import { BrowserAnimationsModule } from '@angular/platform-browser/animations';

import { MatCardModule } from '@angular/material/card';
import { MatProgressBarModule } from '@angular/material/progress-bar';
import { LoadingDataComponent } from './loading-data/loading-data.component';
import { OverlayModule } from '@angular/cdk/overlay';

@NgModule({
  declarations: [
    AppComponent,
    LoadingDataComponent
  ],
  imports: [
    BrowserModule,
    AppRoutingModule,
    BrowserAnimationsModule,
    MatCardModule,
    MatProgressBarModule,
    OverlayModule
  ],
  providers: [],
  bootstrap: [AppComponent]
})
export class AppModule { }
NOTE – If at any time during this exercise you get initializer errors to the effect of LoadingOverlayRef not having an initializer, add this to your “compilerOptions” section in ts.config.json: “strictPropertyInitialization”: false I don’t much care for this check, so I turn it off, but I’ll leave a link that explains this setting further at the end of the article, also showing other options.
Now let’s create our Loading Data component that will be used as our overlay:
>> ng g c loading-data
This component will be super simple, just some HTML.
For the guts of this example, we’ll just use App Component though you’d likely be in a custom component in a real project. Let’s start with the very basics of coding an overlay that we can toggle on and off. First, the HTML we’ll use temporarily to test our overlay being displayed then hidden:
We’ll have more to do in the HTML file shortly, but for now this button will let us test our loading dialog. Now let’s wire up all the overlay goodness in our App Component:
If you’ve never used an overlay, there’s quite a lot going on you haven’t seen before. You’ll be assigned some reading after, but the short of it is we have 4 objects involved in displaying our LoadingDataComponent as an overlay: Overlay, OverlayConfig, OverlayRef, and ViewContainerRef that are manipulated in 2 methods called openLoadingPanel() and closeLoadingPanel().
Firstly, in OpenLoadingPanel(), we create an OverlayConfig that has various options for our dialog:
You can see this config will center our dialog on both axis and use a backdrop that produces a shadow (hasBackdrop) that will disable anything behind it. This is then created in our OverlayRef variable which we smartly named loadingOverlayRef:
So, let’s run the app at this point and click the toggle button. Our panel indeed displays for 5 seconds then closes:
Fantastic. Now that we have the basics in place, let’s return to our original use case – we want to display this panel while several child components load data, and we only want to close it when ALL child components are complete. To that end, let’s create a reusable child component we can embed on the parent page several times. We’ll also use an input variable so we can pass a number of seconds to wait before completing the simulated data load. That way, each child component will take a different amount of time to complete, simulating various API calls in the real world, some taking longer than others. Create a new reusable child component called generic-child:
>> ng g c generic-child
We’ll just display a string variable in the HTML:
Generic child HTML (generic-child.component.html)
<p>{{ displayText }}</p>
Now I’ll use an input variable in our component file that contains a number of milliseconds to delay displaying a message of ‘Complete!’. Again, this would simulate an API call that doesn’t return instantly:
So all we’re going to do is use setTimeout() to wait the number of milliseconds passed in, then change the dislayText to complete. Let’s put one of these generic-child components on our parent page to validate the functionality:
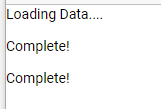
Running our app now displays the text ‘Loading Data….’ for 5 seconds, then changes the display to ‘Complete!’. Let’s add a few more of the generic-child components, each with a different delay. I’ll add 3, but you can add 20, 30, 50 or even 1000 if you’d like! (don’t add 1000).
As you can see, we now have 3 child components, and they’re all returning the complete message at different times:
Let’s add one last thing to the generic child html file, a simple text box. You can imagine each control might have some user interaction and we don’t want the user to be able to do anything until each instance of generic child loads its data:
Generic child HTML (generic-child.component.html)
<p>{{ displayText }}</p>
Value: <input type = "text" />
As it stands, you can enter data into each text box before the data has completed its simulated load:
So, let’s fix all this and talk about how we’re going to coordinate this in the parent component. I said earlier we’re going to use some output variables and some simple math, and I wasn’t kidding. Let’s add two class variables to the parent:
Now we provide the event binding in the output variable in the HTML tag of each child instance much like we did for the property binding in the input variable of ‘delay’:
So each child now can fire the childComplete() method in the parent as their data load completes. But before we run this, let’s make one final change to the parent component:
App component (app.component.ts)
  ngOnInit(): void {
    this.openLoadingPanel();
  }
We’ve added a call to openLoadingPanel() right in the OnInit method because we want the Loading Data panel to display when the component is rendered. Now, as each child completes, they will call childComplete() and increment currentNumberOfComponentsLoaded by 1:
this.currentNumberOfComponentsLoaded += caller;
And while any child component is waiting to render its data, we are locked out of interacting with any of the form controls, as we intended:
Once all children have finished and currentNumberOfComponentsLoaded equals targetNumberOfComponentsToLoad, closeLoadingPanel() is called:
    if (this.currentNumberOfComponentsLoaded ===
        this.targetNumberOfComponentsToLoad) {
      this.closeLoadingPanel();
    }
And voila, we have a fully populated page of components complete with a Loading Data dialog displayed until all children have finished loading.
In closing, this is a super simple method for a parent component to keep track of child data loads, but this method is great for a few other reasons:
1) Changing the number of components that load is as simple as changing the targetNumberOfComponentsToLoad variable. Again, if you have 3, 5, 10, 20 components, all you have to do is change the target value and this method works.
2) It works with any level of component nesting There’s no limit on how many levels of children you can use with this method. If you ever have a case where you have a parent component with children and that component has its own children – no matter the level, a component simply waits until all its child components have checked in, then reports to its parent that it’s complete. That component can then do the same to its parent.
3) It doesn’t just have to be a number; you can get fancy with what you pass back to the parent. In this case, we’re just passing a “1” back to the parent, but we could also pass something a bit more exotic like a message. You could imagine a case where the parent might have a central area where the status of each load is being reported:
We talked about preventing navigation when a form has uncommitted data a few articles back Prevent Navigation from Forms with Uncommitted Data – Angular Love Fest but what’s a good way to detect form changes so we know if we should prevent navigation or not? If you’re ever bored and think “I hope there’s 40 or 50 different ways to accomplish this”, then detecting form changes is a great topic for you to read up on!
However, today I’ll talk about a way I’ve done form change detection in the past and I like it because it’s proven quite effective over time, it’s fairly simple, and doesn’t require a lot of exotic things going on.
While this technique is fairly simple, there are some gotchas you need to be aware of that we’ll code for, so do read the whole thing. First thing we’ll need is, duh, a form. So, let’s make that component:
So, we’ve got a textbox, a checkbox, a dropdown and a text area just to cover some of the more common inputs. We also have a button to save the form as we’ll have some things to do in the SaveForm() method. Since the purpose of this article is to demonstrate if any changes in the form have taken place, what we really need as well is a link to navigate off the page. Then we can do some testing to see what happens when a user changes some of the form values and tries to leave the page. Let’s add that link at the very bottom of the above html:
So fairly straightforward so far, we’ve created FormControls for our html elements and a FormGroup named myFormGroup. Two simple methods just fire off an alert when we do a simulated save or navigate away from the page. Our humble little ugly form looks like this now:
So let’s wire up our change detector. And it’s really quite simple provided you code for aforementioned gotchas, which we will of course do. Let’s first add a class variable to our component file:
.......
  initialFormValue = '';
.......
And then we’ll set this value using JSON.stringify in the OnInit. Add this code in that method, right after the form group is built:
So, at very end of our Init, we’re setting initialFormValue to the JSON string representation of our form (and outputting it to the console.) In dev tools we can see what that variable looks like:
As expected, a bunch of empty strings. Now let’s wire up some compare logic in our navigate away method. Replace tryToLeavePage() with the following:
tryToLeavePage(): void {
console.log('Initial Form: ' + this.initialFormValue);
console.log('Current Form: ' +
JSON.stringify(this.myFormGroup.value));
if (this.initialFormValue ===
JSON.stringify(this.myFormGroup.value)) {
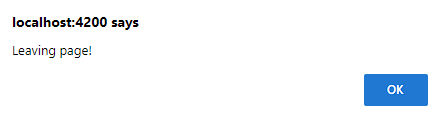
alert('Leaving page!');
} else {
alert('Form has changed, can\'t let you leave!!');
}
}
We’ve got 2 log statements so we can see what’s going on and then the guts of the method which essentially compares the JSON string of the initial FormGroup value to the current value of the FormGroup. If they match (i.e., nothing has changed), we simulate the user being allowed to navigate away from the page. If they don’t equal (some form value has changed), we prevent navigation.
If you click the “Leave page” link without making any changes to the form, you can see navigation is permitted. However, change any value in the form and click “Leave page” again and you’ll see the differences in the JSON strings outputted to the console. So, the very basics of this technique are working.
BONUS: One of my favorite aspects of this method is that if the user changes a value on the form, then changes it back to its previous value, it is NOT reported as a change. This is because we are literally comparing values as opposed to checking if a form control is pristine or dirty.
So, in the method I’m describing here, it’s really as simple as that – comparing 2 JSON strings. However, there’s more to handle to make this work properly and we’ll go over those steps one by one in the next section.
NOTE: If you really want a good example of preventing navigation away from a page that is much more comprehensive than the simple button we’re using here, something you can actually use in your apps to truly prevent navigation, including closing the tab / browser, see the article mentioned above: Prevent Navigation from Forms with Uncommitted Data – Angular Love Fest
Step 1: Account for form initial population
Let’s pretend we grabbed some values from a database when the form is loaded, as the user can come back and edit this form as much as they want. As opposed to writing a service, let’s just use consts for this example to represent the values that were retrieved from the database. In our Init method, right before setting initalFormValue, let’s add variables and setValue statements:
If you now try modifying the form and then clicking to navigate away, everything still works. However, let’s pretend this is a new record and there aren’t any values in the database just yet. (Or perhaps only some form values were saved last time). In that case, we’d pull null from the database as well. So let’s set them all to null to see what happens.
Now if you navigate away immediately, you’ll get the expected response that nothing has changed. However, go ahead and enter a value in name, then delete it. Also click the checkbox, then unclick it. Now the form should be in the same shape as when it was loaded however, we can see our comparison fails:
Initial Form: {"myName":null,"active":null,"department":null,"notes":null}
Current Form: {"myName":"","active":false,"department":"","notes":null}
So, when we modify a textbox control and then clear it out, the form value is not set back to null, but an empty string. And in the case of the textbox, it’s set to false. So even though conceptually nothing has changed on the form, our comparison indicates quite a lot has changed and prevents navigation – not what we want.
The way to handle this is we must exorcise all nulls from our controls when the data is loaded:
NOW, load up the form, change all 4 values, then change them back. As we would expect, we’re now allowed to leave the form as nothing has really changed!
Big Sidebar:
Before we get to the next step, I do need to bring up a possible situation when saving these values to the database. While we’re not really using a database in this example and we’re not going to write any code for our save button in this example, this does need to be mentioned as it might affect your code. That depends 100% on the business rules of your app. Now at the shop I work at, once a user saves a form, if they don’t enter a value into a textbox, it gets saved to the database as an empty string, as conceptually at least, that is the value they saved. And this has never caused any issues for us. If that’s your case, you can skip to Step 2 or read on just in case you ever face this situation. Also, if you have the choice, I would highly recommend going this way.
However, your buiness rules might dictate that if the user saves a form, and hasn’t entered a value or clicked the checkbox that a null value be saved to the database. And that’s just fine. You just have a bit more coding to do in our hypothetical save routine, essentially checking if each control has been “touched” or not, which Angular conveniently exposes for us. Let’s use myName as an example to demonstrate this. Temporarily, change the code of the saveForm to this:
Now load up the form and click save. You’ll see that the control reports as not having been changed and not having been touched, exactly what we’d expect. Now, enter some text into the name box, then delete it, restoring the myName control to blank. Now click save and you’ll see that changed still reports as false, but touched now reports as true and these are the checks you’d need to make in order to determine if a null should be written to the database:
If a control has no value AND the user hasn’t touched it, you’d record a null to your db.
As to how you’d have to apply this to other controls such as a checkbox is why this method doesn’t make a whole lot of sense to me. Using the same methodology – if a control is blank and the user hasn’t touched it then it’s null:
If a checkbox field in the database has a null value, when that value is loaded, the checkbox is going to show as “false” on the form even though the user hasn’t touched it yet. So, using the above logic, when saved, a null would get written back to the database as the checkbox is still false and it hasn’t been touched.
But what if the user wants it to be false? In this case, they’d have to click it true, so the checkbox control registered as having been touched, but then they’d have to click it again to set it to false! You can imagine how angry a user would be to have to be trained and remember to do that. So, in my opinion, if you have the choice, don’t persist nulls in the database from a form save, but if you must – you know how to check if a user has touched a control.
To continue, we’ll not be saving nulls to our db so restore saveForm() to it’s original simplicity:
  saveForm(): void {
    alert('Saved!');
  }
Step 2: Reset the initialFormValue
Let’s look at the other thing that can bite you in the butt when using this method if you don’t code for it. Load up the form again and change a few values. Now click Save. The try to leave the page. Well come on, I saved (simulated) the form and it’s still telling me I can’t leave the page!
Now you might have a Save / Submit button that has a redirect at the end of it. However, if you have a Save where the user remains on the page, you’ll need to alter saveForm():
Simple fix, but easy enough to miss. The idea being once the user saves the form, the initial values do need to be reset to whatever they saved so the navigation check works properly. Now make a bunch of changes, save the form, then try to navigate away. Victory! We get the behavior we expect. Just one final step which is super simple but also important.
Step 3: Only Reset initialFormValue if the Form is Valid
Our form controls haven’t had any validators up to this point and that would be unusual outside of this example in the real world. Let’s add a validator to name to finish this off:
this.myName = new FormControl('', Validators.required);
With the validator added, we can now show that you don’t want to reset initialFormValue just any old time the user clicks save but only if the save operation was permitted, i.e., the form was valid and actually saved. So, let’s modify saveForm one final time:
  saveForm(): void {
    if (this.myFormGroup.valid) {
    this.initialFormValue = JSON.stringify(this.myFormGroup.value);
    alert('Saved!');
    } else
    {
      alert('Form is not valid! (enter a name)');
    }
  }
And now we’re done! You can see by now changing some values in the form, we’re only permitted to leave once save is clicked AND the form is valid, as that’s the only time the initialFormValue is reset:
So hopefully you find this technique useful. There are just a few caveats to code for, but we end up with a pretty simple and fairly durable way to determine if there’s been a form change quickly AND to isolate only true changes to the form.
Recently this issue came up and I thought it would be a great use case to demonstrate where if we could only pass variables ByRef in TypeScript, our code could be so much cleaner.
In JavaScript (i.e., TypeScript, i.e., Angular), function arguments are almost always passed by value, which essentially means that any variable you pass into a function is passed in as a copy of that variable, not the original variable itself. There are many cases where you could save a bunch of coding if you could only get the method to modify the original variable and not a copy of it. This is called passing by reference.
In this example, I’m going to demonstrate a way to pass function arguments by reference rather than by value and save some coding. So, let’s just jump right into the example.
The hypothetical company we work for is a telemarketer that sells extended car warranties. Did I intentionally pick a type of company that we hate the most? You bet. We can hate the example company and still learn.
Let’s say the salespeople have 3 metrics that are tracked via surveys:
Knowledge
Courtesy
Speed
(In our fantasy world, they sell a LOT of warranties and people even stick around to take the phone survey every time. Pretend is fun).
When the manager pulls up a telemarketer employee, he or she wants to see these metrics for the employee both for the current day and the previous day. In addition, they’d like to display an arrow to indicate the trend of each metric, i.e., if the current day’s rating is more than the previous day’s rating, an up arrow will be displayed to indicate the metric is trending up. Similarly, if the current day’s rating is less than yesterday’s rating, a down arrow should be displayed to indicate the metric is trending down. If the current and previous ratings are the same, a simple dash is to be displayed to indicated there is no trend up or down. One final requirement – if there’s a problem retrieving either piece of data, no trending image should be shown at all.
Following the instructions and using the version table they provide; this is what I used to install Font Awesome. I have Angular 13 on the machine I’m using, so I used 0.10.2 for my Font Awesome version:
If you haven’t played with the Font Awesome icons, you’re missing out on some cool stuff, so added bonus of working through this. Now that we’ve got that set up, let’s create a component for our ratings ByVal page:
>> ng g c ratings-by-val
We’ll create some mocked calls to an API via a service we’ll create shortly that will return several things:
A boatload of employee attributes (simulated)
A current and previous value for each of our 3 metrics.
Let’s start with the HTML file to see our UI elements:
Ratings By Val HTML (ratings-by-val.component.html)
<div class="container">
    <div class="row">
        <div class = "col">Knowledge Rating</div>
        <div class = "col">{{ knowledgePreviousRating }}</div>
        <div class = "col">{{ knowledgeCurrentRating }}</div>
        <div class = "col">
            <fa-icon [icon]="faKnowledge" class="{{ knowledgeClass }}"></fa-icon>
        </div>
    </div>
    <div class="row">
        <div class = "col">Courtesy Rating</div>
        <div class = "col">{{ courtesyPreviousRating }}</div>
        <div class = "col">{{ courtesyCurrentRating }}</div>
        <div class = "col">
            <fa-icon [icon]="faCourtesy" class="{{ courtesyClass }}"></fa-icon>
        </div>
    </div>
    <div class="row">
        <div class = "col">Speed Rating</div>
        <div class = "col">{{ speedPreviousRating }}</div>
        <div class = "col">{{ speedCurrentRating }}</div>
        <div class = "col">
            <fa-icon [icon]="faSpeed" class="{{ speedClass }}"></fa-icon>
        </div>
    </div>
</div>
So easy enough – we’ll be displaying a section for each rating that has previous rating, current rating, then the above-mentioned arrow in the [icon] property of the fa-icon tag, binding to a variable in each case (faKnowledge, etc). Also, we have the class of the fa-icon element being bound to a variable – knowledgeClass, speedClass, etc. This is how we’ll display or hide the icon if there’s a “problem” retrieving any data values, supposing our API might not be able to retrieve some data for whatever reason from time to time. In our scss file, we add two classes to handle showing or hiding the icon:
Now we’ll create a service that is a mock API that fetches our data from a database of employee data by employeeId, and returns, as previously mentioned, a boatload of employee attributes (simplified to one field: employeeAttributes), and the current and previous values for our 3 metrics.
Employee Service (employee-service.ts)
import { Injectable } from '@angular/core';
import { Observable, of } from 'rxjs';

@Injectable({
  providedIn: 'root'
})
export class EmployeeService {

  constructor() { }


  getEmployeeDetails(empId: number): Observable<any> {


   const mockJson = {

            employeeAttributes: 'A bunch of employee related attributes',
            knowledgePreviousRating: 8,
            knowledgeCurrentRating: 10,
            courtesyPreviousRating: 12,
            courtesyCurrentRating: 12,
            speedPreviousRating: 7,
            speedCurrentRating: 5

   };
   return of(mockJson);
  }

}
Ok that’s all the setup, so let’s have a look at our component file to hook everything up:
Ratings By Val Component (ratings-by-val.component.ts)
import { Component, OnInit } from '@angular/core';
import { faArrowUp, faArrowDown, faMinus} from '@fortawesome/free-solid-svg-icons';
import { EmployeeService } from '../employee-service';

@Component({
  selector: 'app-ratings-by-val',
  templateUrl: './ratings-by-val.component.html',
  styleUrls: ['./ratings-by-val.component.scss']
})
export class RatingsByValComponent implements OnInit {


  faArrowUp = faArrowUp;
  faArrowDown = faArrowDown;
  faMinus = faMinus;

  employeeAttributes: string;

  knowledgePreviousRating: number;
  knowledgeCurrentRating: number;
  faKnowledge = faMinus; // set to minus for now
  knowledgeClass = 'fa-hide';

  courtesyPreviousRating: number;
  courtesyCurrentRating: number;
  faCourtesy = faMinus; // set to minus for now
  courtesyClass = 'fa-hide';

  speedPreviousRating: number;
  speedCurrentRating: number;
  faSpeed = faMinus; // set to minus for now
  speedClass = 'fa-hide';


  constructor(private _employeeService: EmployeeService) { }

  ngOnInit(): void {

    this._employeeService.getEmployeeDetails(1234).subscribe((data) =>{

      this.employeeAttributes = data['employeeAttributes'];
      this.knowledgePreviousRating = data['knowledgePreviousRating'];
      this.knowledgeCurrentRating = data['knowledgeCurrentRating'];
      this.courtesyPreviousRating = data['courtesyPreviousRating'];
      this.courtesyCurrentRating = data['courtesyCurrentRating'];
      this.speedPreviousRating = data['speedPreviousRating'];
      this.speedCurrentRating = data['speedCurrentRating'];

      this.assignIcons();


    });
  }

  assignIcons(): void {

    this.knowledgeClass = 'fa-display';

    if ((this.knowledgePreviousRating == null) ||
         (this.knowledgeCurrentRating == null))
    {
      this.knowledgeClass = 'fa-hide'
    } else if (this.knowledgePreviousRating > this.knowledgeCurrentRating)
    {
      this.faKnowledge = faArrowDown;
    } else if (this.knowledgePreviousRating < this.knowledgeCurrentRating)
    {
      this.faKnowledge = faArrowUp;
    } else if (this.knowledgePreviousRating === this.knowledgeCurrentRating)
    {
      this.faKnowledge = faMinus;
    }


    this.courtesyClass = 'fa-display';

    if ((this.courtesyPreviousRating == null) ||
         (this.courtesyCurrentRating == null))
    {
      this.courtesyClass = 'fa-hide'
    } else if (this.courtesyPreviousRating > this.courtesyCurrentRating) {
      this.faCourtesy = faArrowDown;
    } else if (this.courtesyPreviousRating < this.courtesyCurrentRating) {
      this.faCourtesy = faArrowUp;
    } else if (this.courtesyPreviousRating === this.courtesyCurrentRating)
    {
      this.faCourtesy = faMinus;
    }


    this.speedClass = 'fa-display';

    if ((this.speedPreviousRating == null) ||
         (this.speedCurrentRating == null))
    {
      this.speedClass = 'fa-hide'
    } else if (this.speedPreviousRating > this.speedCurrentRating) {
      this.faSpeed = faArrowDown;
    } else if (this.speedPreviousRating < this.speedCurrentRating) {
      this.faSpeed = faArrowUp;
    } else if (this.speedPreviousRating === this.speedCurrentRating)
    {
      this.faSpeed = faMinus;
    }

  }
}
So a decent chunk of code for sure. Some things you’ll want to notice in the above file: We’re importing the icons we need from font-awesome:
import { faArrowUp, faArrowDown, faMinus} from '@fortawesome/free-solid-svg-icons';
Then we create a class variable for each, named the same:
If you hover over these in your code, you’ll notice they are of the IconDefinition type, also from the font-awesome library. In in the OnInit(), we’re assigning the fields returned from the service to our UI, but also note the call to assignIcons() as the final step in our init method:
So once our current and previous variables are set, a method called assignIcons() is called to handle which arrow to display (or hide) for each metric. Think what you will about our extended car warranty telemarketing company, but this is an excellent example of a method that would benefit if we could pass in parameters ByRef (which we will do shortly!)
First though, let’s look at what it does currently:
    this.knowledgeClass = 'fa-display';

    if ((this.knowledgePreviousRating == null) ||
         (this.knowledgeCurrentRating == null))
    {
      this.knowledgeClass = 'fa-hide'
    } else if (this.knowledgePreviousRating > this.knowledgeCurrentRating)
    {
      this.faKnowledge = faArrowDown;
    } else if (this.knowledgePreviousRating < this.knowledgeCurrentRating)
    {
      this.faKnowledge = faArrowUp;
    } else if (this.knowledgePreviousRating === this.knowledgeCurrentRating)
    {
      this.faKnowledge = faMinus;
    }

// rinse / repeat for courtesy metric

// rinse / repeat for speed metric
As you can see, assignIcons() consists of the same block of logic duplicated for each of our 3 metrics and does the following:
1) Sets the class of the icon to fa-display. As the icon is only hidden in one condition (either field is null), this effectively sets the class for the other 3. 2) If either value is null or undefined, sets the class to ‘fa-hide’. Per the requirement, this will hide the arrow if some of the data was unavailable. We’ll test this in a moment. 3) If previous is greater than current, set the icon to the down arrow. 4) If current is greater than previous, set the icon to the up arrow. 5) Finally, if they equal, set the icon to the minus sign (dash).
This is then repeated for the remaining 2 metrics, resulting in quite a bit of duplicated code. (Imagine if there were 5 or 10 metrics!). But you can see this is working as expected in our UI:
You can also test the class swap logic by removing one of the values. Comment out the following line in the service and you’ll see the hiding of the arrow works as well:
// knowledgePreviousRating: 8,
Now we’re simulating a situation where the API was unable to retrieve the knowledge previous rating, and no icon is displayed at all as the ‘fa-hide’ class has been applied to the icon as expected:
So cool, we have functional code. A bit repetitive, but it does work so clearly, we can go home for the week. (We cannot go home for the week).
You might be thinking, this would be much easier if we could modify the data returned, and that’s typically true. However, you might also be stuck using a 3rd party API, which happens a fair amount in the world, and have no control over the shape of the data (or simply an API from another group the in the company that has no desire to change it). The purpose of this article is to demonstrate byVal vs byRef which this example very much does, so let’s make the assumption were using a someone else’s API and we’re stuck with this data format.
Let’s examine the problem a bit deeper by briefly by writing a quick method that demonstrates ByVal behavior. makeIconUpArrow() is a method where we pass an icon in as a parameter and modify it to see what happens. Have a look at this method and let’s, for the moment, add it to our component.ts file:
Our new method simply takes an icon as a parameter, sets that icon to the arrow up, then returns it. Let’s add a call to this method for all 3 icons at the end of onInit() and see what happens. Add these 3 lines after the call to assignIcons() in our init method:
      this.assignIcons();

      // New code
      this.makeIconUpArrow(this.faKnowledge);
      this.makeIconUpArrow(this.faCourtesy);
      this.makeIconUpArrow(this.faSpeed);
So regardless of what icons are assigned to each metrics, we’re just going to try to override that at the end of the OnInit() and assign the up arrow to each icon. The result of this:
And you can see, nothing has changed. Because in Angular, variables are passed byRef. It’s actually a copy of the variable that’s being modified in the makeIconUpArrow() method, not the original icon itself. This is not an Angular issue, nor is it really a TypeScript issue. Since at the end of the day we’re compiling (technically transpiling) to JavaScript, the ByRef / ByVal behavior has its roots in JavaScript. In JavaScript, primitives (plain old variables) are passed by value. There is no altering that behavior. HOWEVER, and great news for us, Arrays and Objects are passed by reference. So, if the little hamster that spins the wheel that powers your brain is running at full speed and you’re thinking “So if we wrap everything in an object, it will work….”
Correct, that is the solution! (My little hamster broke his leg years ago).
So, let’s make some changes and create a much cleaner method that modifies our icons ByRef. First thing we’ll do is create a Ratings ByRef component:
>> ng g c ratings-by-ref
The one thing we’ll copy over from our previous component is the css styles, so add these 2 styles again:
Now we’ll build an object, actually an array of objects, for our data so we can pass everything ByRef into our icon logic. First thing we’ll do is create a model which makes life much easier when dealing with objects (yes, I’m guilty of using “any” more than I should in these examples). Our model for rating items:
Next we’ll create the Ratings ByRef component file. We’ll both import that class and create a new variable called ratingGroup. This will hold an array of RatingItem objects. In our Init method, we’ll now build this array of RatingItems from the data retrieved from the service:
Now we have an array of the 3 groups of data points for our UI, with some placeholder values for icon and class which will get changed by our assignIcons() method, which is blank for the moment, and we’ll fill in shortly. First let’s look at our new html file, wired up to our new array of objects:
Ratings ByRef HTML (ratings-by-ref.component.html)
<div class="container">
    <div class="row">
        <div class = "col">ratingGroup[0]['ratingName']</div>
        <div class = "col">{{ ratingGroup[0]['previousRating'] }}</div>
        <div class = "col">{{ ratingGroup[0]['currentRating'] }}</div>
        <div class = "col">
            <fa-icon [icon]="ratingGroup[0]['icon']"
             class="{{ ratingGroup[0]['class'] }}"></fa-icon>
        </div>
    </div>
    <div class="row">
        <div class = "col">ratingGroup[1]['ratingName']</div>
        <div class = "col">{{ ratingGroup[1]['previousRating'] }}</div>
        <div class = "col">{{ ratingGroup[1]['currentRating'] }}</div>
        <div class = "col">
            <fa-icon [icon]="ratingGroup[1]['icon']"
             class="{{ ratingGroup[1]['class'] }}"></fa-icon>
        </div>
    </div>
    <div class="row">
        <div class = "col">ratingGroup[2]['ratingName']</div>
        <div class = "col">{{ ratingGroup[2]['previousRating'] }}</div>
        <div class = "col">{{ ratingGroup[2]['currentRating'] }}</div>
        <div class = "col">
            <fa-icon [icon]="ratingGroup[2]['icon']"
             class="{{ ratingGroup[2]['class'] }}"></fa-icon>
        </div>
    </div>
</div>
This is similar to our previous html file; however, our values are now bound to the appropriate item in the array of objects we are creating now. If we start our app and have a look at the current output, we see that everything is bound correctly in the UI, however our icon logic isn’t working yet as expected since the assignIcons() method is empty at the moment:
Now let’s add the guts to our new assignIcons() method and have a look. First alter the final line in the Init method, modify the call to assignIcons() to pass in (ByRef!) our ratingGroup array of objects:
this.assignIcons(this.ratingGroup);
Then replace the empty assingIcons() method with the actual code:
Now that’s a method you can show to your children with pride. As you can see, since we’re working with an object, everything is now passed byRef to this method, so we simply loop through the array of objects. assignIcons() can loop through 5, 10, 100 ratings no problem:
Look at that, a winner is you!
So, in summary, while it would be great if in TS / JS we could simply specify byRef or byVal on method parameters, with some creative use of Arrays and Objects, we can achieve the same result.
Problem: My users are stupid and keep navigating away from a form with changed or dirty data or closing the browser altogether then complain because none of their changes are showing up.
Your users are not stupid, they’re just busy with jobs that aren’t writing software. We all face this common problem with end users. They either:
navigate away from a form with uncommitted / dirty data.
close the browser or tab when a form has uncommitted / dirty data.
Typically, this is followed by blaming the app for not saving their changes. While we have some options here, such as forms that save every so often, today we’ll look at a pretty typical solution – a simple confirmation prior to navigation or closing the browser / tab. There are several approaches to this, but the following is how I’ve implemented this several times and I’ve found it to be pretty durable. If you have a different approach, feel free to share it or improve upon this one.
We’ll need to hit this from two angles, using an Angular route guard for in app navigation and then hooking to a DOM event in case the user tries to close a tab or the entire window.
NOTE – If you’re using lazy loading with your modules (as we do where I work), there’s some changes you’ll need to make which I’ll go over at the very end of the article.
So let’s get started – we’ll create 2 components in our app, one that will utilize the dirty form logic, the other will be a separate route so we can see the navigation behavior in action:
>> ng g c dirty-form
>> ng g c other-route
Now we’ll need to set up a route to each component:
Ok, super simple, we have an app with 2 components and the ability to route between them. Let’s do some modifications to our dirty-form.component files.
Dirty Form HTML (dirty-form.component.html)
<p>Form goes here.</p>
Amazing levels of realism I know, but in actuality we don’t need a form to demonstrate what we’re doing here, just a placeholder.
Earlier I stated we’d need to attack this from two angles, and for both we’ll need an Angular route guard. Route guards, if you’ve never used one are interfaces provided by Angular that allow us to control access to our routes. There are several types which you will read up on at the end of the article. For our purpose, thankfully Angular provides just the type of route guard we need called CanDeativate. Let’s create that very thing in a new file:
Route Guard (dirty-form-guard.ts)
import { CanDeactivate } from '@angular/router';
import { Injectable } from '@angular/core';
import { Observable } from 'rxjs';

export interface ComponentCanDeactivate {
  canDeactivate: () => boolean | Observable<boolean>;
}

@Injectable()
export class DirtyFormGuard implements CanDeactivate<ComponentCanDeactivate> {
  canDeactivate(component: ComponentCanDeactivate): boolean | Observable<boolean> {
    return component.canDeactivate() ? true :
      confirm('WARNING: You have unsaved changes. Press Cancel to go back and save these changes, or OK to lose these changes.');
  }
}
End result of this – we’ll be able to use a boolean (say formUnchanged or something of the like) to determine if a user can navigate away from a page or close the browser window. This is powerful stuff and makes it very easy to implement on every form in our app. Total win.
So how do we use this newfound power? First, let’s make sure we provide it in our app module:
App Module (app.module.ts)
....
  providers: [DirtyFormGuard],
...
And now in our dirty form component file, let’s wire up the guard:
So 2 things in our DirtyFormComponent, notice we implement the interface from our route guard, ComponentCanDeactivate:
export class DirtyFormComponent implements OnInit, ComponentCanDeactivate {
This is good practice and ensures that we provide the guts for (or an implementation of) the required method canDeactivate():
  public canDeactivate(): Observable<boolean> | boolean {

    return this.formUnchanged;

  }
Now in this case we are doing something very simple – we have a variable called formUnchanged (set to false) as a placeholder to indicate that a user has made a change to the form on the page.
This is in the interest of sanity. I’d prefer a series of smaller articles that address a single need rather than something that’s 1700 pages long. The reason being is HOW to tell if a user has truly made a change to a form is an entire discussion in itself (which everyone seems to have their own approach to) and will be covered in its own article which I will link to here: Simple Change Detection on Angular Forms – Angular Love Fest
Give that a good read when you have some time, but for now let’s simply concentrate on the topic at hand of how to prevent navigation when the form has changed and for that purpose – our little boolean will do just fine.
So our final step in preventing in app routing is to assign this route guard to whatever components we care to. In this case, we’ll attach it to our dirty form component in our app routing file:
I mentioned earlier that we can use this logic in every form in our app and you can see how easy it is to use this guard on whatever routes we want. Let’s see what happens now when we start our app and try to navigate away from our dirty form component:
Fabulous! You can see anytime we click on the “Dirty Form” route then try to navigate to “Other Route”, our confirmation box fires and forces us to hit ok to proceed (or cancel to stay). Also note if we set our formUnchanged variable to true in the dirty form component, this simulates a user having made no changes to the form and navigation proceeds without any prompting.
So that’s the first part of the battle – note that you can still close the tab or close the browser entirely and the prompt doesn’t occur, leaving a way for our users to lose uncommitted data. Closing the page / tab is a bit tricker (but not super difficult) to handle and for that we’ll have to hook into the DOM of the web browser. Fortunately, angular makes this very straightforward.
Begins yelling at cloud If you don’t know what the DOM (document object model) is, you’re likely to have not been doing much web programming in the 90s. Back when I had to walk uphill to school both ways and the only game on my phone was Snake, we had to deal with DOM of various web browsers… End yelling at cloud moment
tl;dr – there’s objects and events in your web browser itself that, even though we are very much shielded from them these days thanks to all the wonderful JavaScript frameworks, we still need to access once in a while. And I said Angular makes that very straightforward and indeed they do with a decorator called @HostListener.
From Angualr.io: (@HostListener) Decorator that declares a DOM event to listen for and provides a handler method to run when that event occurs.
EXACTLY what we need and the DOM event in question that we want to listen for is ‘window:beforeunload’:
From Mozilla: The beforeunload event is fired when the window, the document and its resources are about to be unloaded.
So let’s listen for that DOM event and provide a method to run when that event occurs. Make this simple change in dirty-form.component.ts by adding the @HostListener decorator before our canDeactivate() method:
Dirty Form Component (dirty-form.component.ts)
  @HostListener('window:beforeunload')
  public canDeactivate(): Observable<boolean> | boolean {

    return this.formUnchanged;

  }
Now, back in our app, in addition to getting our confirmation prompt when we try to navigate away from the dirty form page, if we try to close the tab or the browser itself:
Now we’ve got our users right where we want them! (not really but count the small victories) If we determine there is uncommitted data, we can now both prevent navigating away from the page and prevent closing the tab or browser without confirmation.
NOTE – You’ll note the message is different when they try to close the browser. Why is that? The short answer – most modern browsers don’t support custom messages in the beforeunload popup. I don’t find this very troubling as the message is pretty clear. You can also copy this message and use it in your canDeativate method if you need them to be consistent.
IF YOU’RE USING LAZY LOADED MODULES We use lazy loaded modules where I work and I had real problems making this work at first, it just wouldn’t work, or I’d get null component error. Let me save you the hair pulling on this one – it’s mentioned here in this issue at the Angular github: https://github.com/angular/angular/issues/16868 (About 1/3 of the way down – picninim commented on Sep 20, 2017 – explains it).
Luckily, it’s not a difficult change, but if you’re using lazy loaded modules you need to move the canDeactive from the app-routing.module.ts to the lazy loaded modules’ routing file, in our example, if we used lazy loaded modules, that would be in the file dirty-form-routing.module.ts:
Dirty Form Routing Module (dirty-form-routing.module.ts)
Nested subscriptions are a big no-no in Angular for many reasons. Nested subscriptions can lead to an unmanageable mess of multiple (even hundreds or thousands of) subscriptions that can cause memory leaks and destroy the performance of your site.
Even worse for the developer – code inspection tools like SonarQube won’t let you get away with nested subscriptions, potentially making your code undeployable.
Say with me – “Nested subscriptions are bad and I promise I’m going to read the links at the end of this article. HOWEVER, I really need to fix this right now as my current sprint is over in 6 minutes.” Ok, fair enough.
Let’s look at a common use case.
Say you have a form with a dropdown containing a list of items from a master table, in our case we’ll say it’s a list of departments. You’re also retrieving an entity from a database that contains a foreign key value to that list, in our example, an employee record is returned with a Department ID foreign key. Once you have the employee record, you’ll display an Employee Edit form, displaying various employee related fields on the form as well as select the value in the dropdown list that displays the employee’s current department. This dropdown also allows the department to be changed by selecting a different value in the dropdown:
The “problem” with this is you can’t just fire off a bunch of async observables and hope to set the Department ID value properly. You have to wait until the dropdown list is populated before you can set the selected id value, so we need a synchronous operation.
Your first thought might be, let me call an observable to retrive the list of department entities then populate a variable bound to the dropdown. ONCE THAT LIST IS POPULATED, (<= main point here), I’ll grab the employee data and then change the selected index of the dropdown to the Department ID of the employee in question.
So plan A becomes:
Subscribe to the Departments observable.
In the complete function of the subscribe, bind the data to the Departments dropdown to populate it. Now call and subscribe to the observable that retrieves employee data.
Once that observable completes, set the correct Department ID value in the dropdown.
Let’s have a look at that code with the above nested subscription. First let’s look at the form and then the service we’ll be using:
Employee Form (employee.component.html)
<p>Employee Edit</p>
<form [formGroup]="employeeForm">

Name: <input type="text" value="{{ name }}"/><br>
Status: <input type="text" value="{{ status }}"/><br>

Department: <select formControlName="departmentsSelect">
    <option *ngFor="let d of departments" [value]="d.deptId">
        {{d.departmentName}}
    </option>
</select>
<br>

<button>Submit</button>
</form>
So two very simple mocked service calls, get the employee details and get the list of departments. Now here’s our component file that uses a nested subscription:
In the above, our nested subscribe has the effect of waiting until the getDepartmentList() call is complete before firing off getEmployeeDetails(123), and ultimately setting the correct dropdown value in the nested subscribe. Now technically this works. However, notice we have 2 subscriptions to manage, sub1 and sub2. You can also imagine how this would look if we had say 3, 4 or 10 nested subscriptions. But again, most importantly – this is not getting past static code analysis – Sonarqube and similar products will publicly mock you for using a nested subscription.
What’s the better way? Plan B – Enter the higher order mapping operators. In short, these operators transform an observable into another observable. Each value from an “outer” observable is mapped to a new “inner” observable. This inner observable is then automatically subscribed to (and unsubscribed from).
Let’s have a look at an example. In this case we’ll use concatMap, although it’s not the only option (switchMap would work well here also. See switchMap in action in this article: Implementing a Typeahead search in Angular using switchMap), but concatMap has some neat behavior you’ll want to know about for your code arsenal. In a nutshell, concatMap does not subscribe to the next observable until the previous completes – essentially it’s the way to run observables in order, synchronously.
You can imagine this having value in many use cases, not just our dropdown example. For instance, if you ever have some complex database operations where an insert MUST occur before an update, or a series on inserts must occur in order, etc. So, let’s have a look at our new employee component, nested subscription eliminated, now using concatMap:
So what did we do here? To use the higher order mapping operators, the results of the first observable (get our departments dropdown) aren’t subscribed to directly but “piped” to the concatMap operator. Once getDepartmentList() completes, the result of it (deptData) is assigned to our local variable this.departments which is bound to our select list. Now it returns the results of our second observable (getEmployeeDetails(123)) and that result is what is subscribed to! Once that completes, we can set our correct dropdown value along with the other employee related fields.
This is good code – static code analyzers will like this code. Notice also we only have one subscription to manage now instead of two, since concatMap automatically subscribes and unsubscribes from the inner observable (getEmployeeDetails). We’ll touch on subscription management in another article as well as when you have to unsubscribe from certain observables (which is a topic of much confusion). But for now, you can see how nested observables could lead to many subscriptions whereas we can use just one subscription when using higher order mapping operators. The end result is much cleaner and more durable code.